Products I Used
Hope everyone is having a fantastic weekend! Today I am going out to a birthday party, so before I leave I deiced to show you all what I used and how to achieve this look. It is perfect for summer, and very easy to achieve. This look is also very versatile and can be used as a day or night look. I chose to use more of golden colors and glitter to give my eyes some pop today. Normally, I tend to stick to neutral based eye shadows, and even though these aren't crazy out there colors it still gives me a little bit of fun to work with. I think this look would be great on any eye color and skin tone, because it still has a natural base but will enhance any person's wonderful features, without stepping out of your comfort zone.
Foundation and Concealer
Today I started off using my Tarte Amazonian Clay 12 Hour Full Coverage Foundation with SPF 15 in the color Light Sand, because it is bright and sunny outside. I put small dabs all over my face using my fingers and then blended it all together using my Flat Top Foundation Brush by Crown Brush. I normally don't use a foundation brush when I am in a hurry, but today I had plenty of time to do my makeup so I wanted that clean airbrushed finish that this brush gives you.
Then I took this 15 Color Camouflage Concealer Palette that I got off of TopHatter, but you can find on eBay for a relatively cheap prices. I used the yellow shade (second row from left, very top) to conceal my under eyes and make them appear lighter. Then I used the shade on the right of that color to go over any redness or blemishes. I used my Stippling Brush from Real Techniques to blend the concealer into my foundation.
Powder and Bronzer
After I put on my foundation and concealer I went in with my NYX Stay Matte But Not Flat Powder Foundation in the color 02 Nude and my Powder Brush from Real Techniques to set my foundation to make sure that it doesn't move throughout the day. I really like this powder because it doesn't leave you feeling cakey and it is a great price for a powder.
After I set my foundation I always go in with bronzer and contour my face. I start out using my Angled Brush from Crown Brush and take my Wet 'n Wild Bronzer in the shade 739 Ticket to Brazil and go in and contour the hollows of my cheeks, my nose, my forehead down to my temples, and my jaw line. Using just the Angled Brush doesn't blend in the bronzer very well so I go in again with my Real Techniques Powder Brush and blend everything out so there is absolutely no harsh lines. I have not seen this bronzer in stores for a long time, so I am pretty sure it is discontinued, I have had this bronzer forever and I just recently hit pan on it.
Brows
After I get done putting on my foundation and powders I go ahead and do my eyebrows. I use the Anastasia Beverly Hills Brow Wiz in the color Medium Brown and I just go over the natural shape of my eyebrows and bring out the end so that my eyebrows are a little longer. I start in the middle of my eyebrows and then go in using lighter and gentler strokes toward the front of them. You want your eyebrows to transition lighter to darker. Lighter being in the front. I do this to fill in the sparse hairs in my brows and to make them longer because my eyebrows are pretty short. I love this brow pencil, it glides on very nicely and it is thin enough to not make any mistakes. I then use the spooly brush at the end of my pencil to go in and blend any harsh lines there could have been. I then go in with Maybelline Great Lash in the color Clear to just set my eyebrows in place.
Eyes
Today, since I wanted the colors to really stand out, I used Rimmel London's Scandal Eyes Eyeshadow Stick in the color 002 BulletProof Beige, instead of a primer. This gave my eyeshadow a nice base to stick to and since it was gold it made the color even brighter. I just rubbed this crayon all over the top of my eyelid and lined my bottom eyelid with it as well.
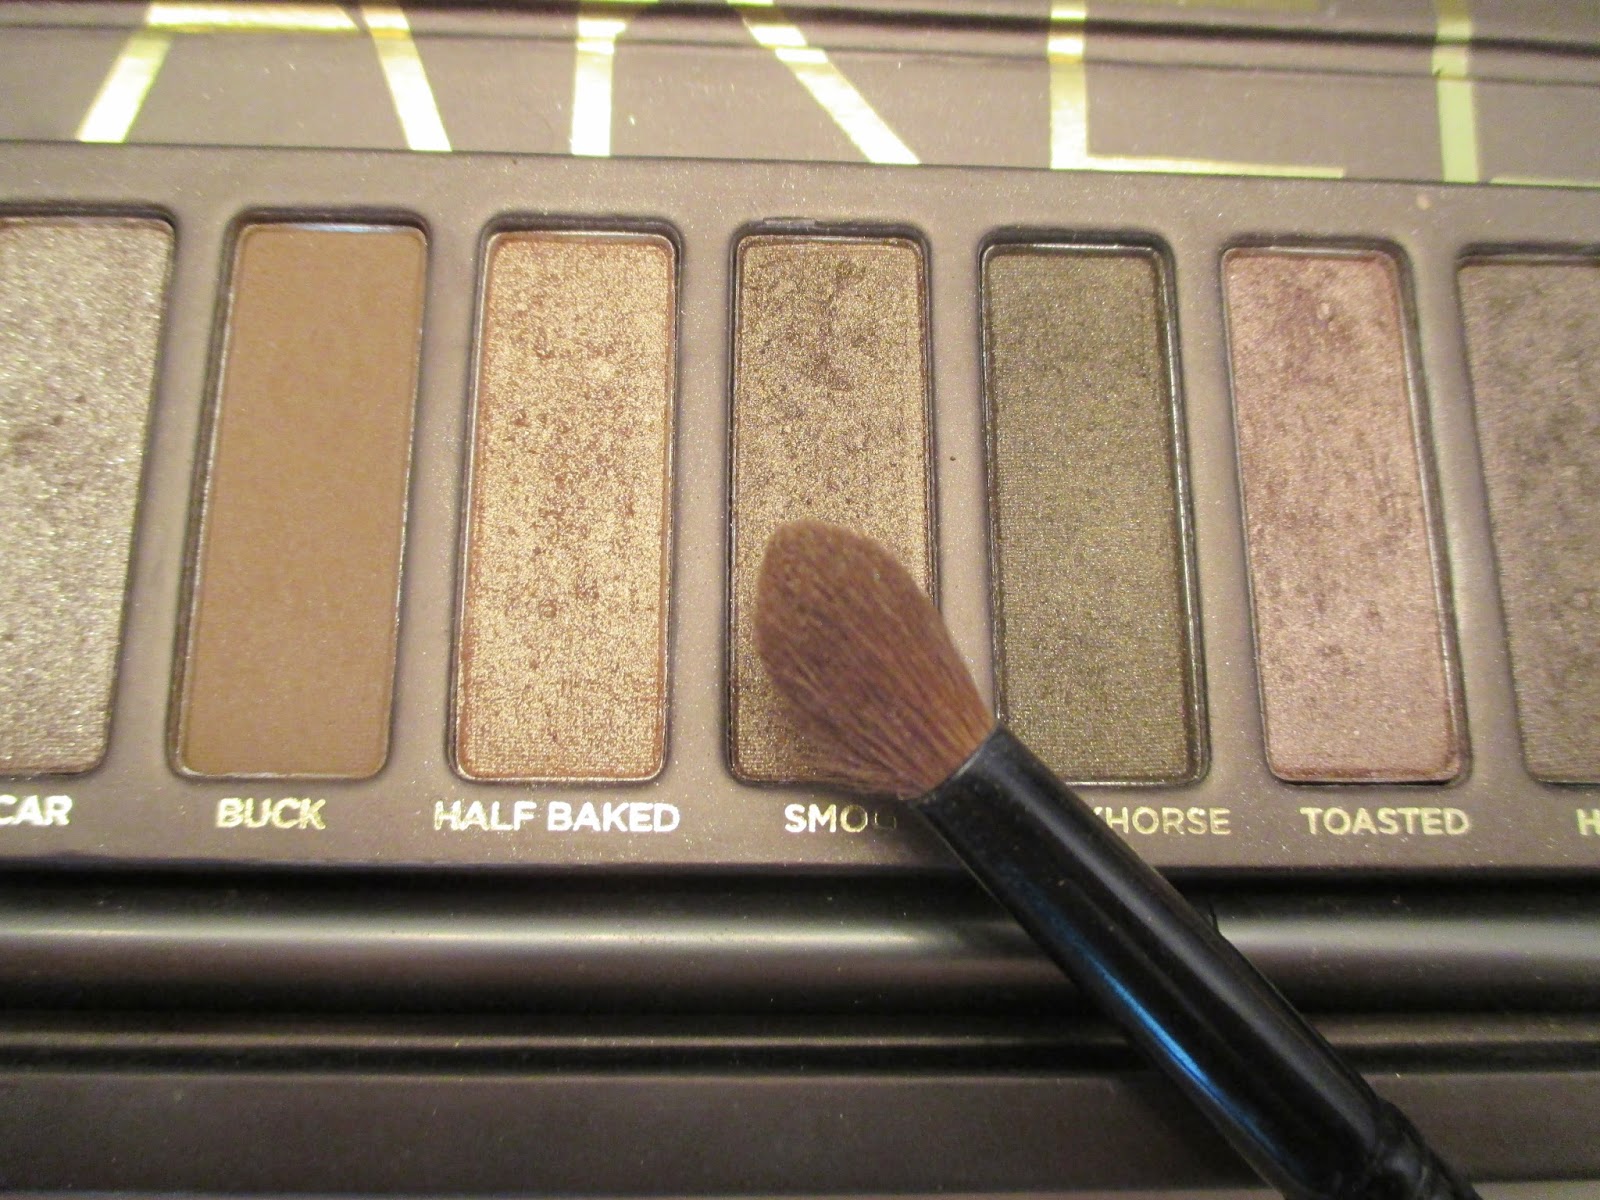
I first went in with Smog from the Urban Decay Naked Palette with my Thin Eyeshadow Brush from Crown Brush and put that only on the outer quarter of my eye.
Then taking Half Baked from the Urban Decay Naked Palette and my Sonia Kashuk Eyeshadow Brush I dabbed this color careful on top of my lid and going slightly over the Smog I put on earlier so it transitioned from lighter to darker. You want to use dabbing motions when using glitter to prevent fall out.
Then taking my Soft Blending Brush that I got from Target I took a little of that Smog color and when in my crease with it using windshield wiper motions.
Having Smog on my crease made it really smokey, and since this was a daytime party I wanted my look to be more toned down. So I took my Angled Blending Brush from Crown Brush and took Bootycall from Urban Decay Naked 2 Palette and went over the edges of smog that was in my crease to soften the color.
Now to make the eye look more brighter I took my Small Tapered Eyeshadow Brush from Crown Brush and I took Virgin from the Urban Decay Naked Palette and placed that on my brow bone and the inner tear duct of my eye.
Then going in with that same Tapered Brush I took more of Half Baked and lined my lower eyelid with it where I put the eyeshadow crayon earlier.
I used my E.L.F Liquid Liner in Black to line my upper eyelid and winged it out.
To finish off the eyes I curled my eyelashes and then went in with my L'Oreal Extra Volume Collagen Mascara.
Blush
To complete the look I used Maybelline Fit Me Blush in Medium Coral to just give a little bit of color to my cheeks. I didn't want to use anything pink or red because I really wanted my eyes to have the most attention when it came to color. So I just lightly put this on the apples of my cheeks.